

Mixing Flash with Ambient Light
Combining flash with the available light in your scene is a powerful technique for photographers who want to create images that feel both dynamic and natural. By learning how to balance these two sources, you can control mood, highlight your subject, and add creative effects to your photos. Whether you’re shooting portraits at dusk, capturing moving cars at night, or experimenting with creative blur, understanding how to blend flash with existing light will expand your creative options.
In this guide, we’ll break down the fundamentals of mixing flash with ambient light, explore practical camera settings, and share tips for achieving both subtle and dramatic results. If you’re interested in related creative techniques, you might also enjoy our article on creative use of blur and sharpness, which explores how motion and focus can work together for artistic impact.
Understanding the Basics of Blending Flash and Available Light
When you use a flash, you’re introducing a burst of artificial light into your scene. Ambient light refers to any existing light—natural sunlight, street lamps, or indoor bulbs. The key to successful mixing flash with ambient light is finding the right balance so that neither source overpowers the other.
Why mix the two? Flash can freeze motion and add sharpness to your subject, while ambient light preserves the atmosphere and context of your location. By adjusting your camera’s exposure settings, you can control how much of each light source appears in your final image.
Camera Settings for Combining Flash and Ambient Light
Getting the right exposure when blending flash with the scene’s natural light involves understanding how your camera’s settings affect each source. Here’s a breakdown:
- Shutter Speed: Controls how much ambient light is captured. A slower shutter lets in more ambient light, while a faster shutter reduces it. Flash duration is usually much shorter than your shutter speed, so it isn’t affected by changes in shutter speed (up to your camera’s sync speed).
- Aperture: Affects both flash and ambient exposure. A wider aperture (lower f-number) lets in more light from both sources.
- ISO: Increases sensitivity to all light. Raising ISO brightens both flash and ambient, but can introduce noise.
- Flash Power: Adjusts how much light the flash emits. Lower power creates a more subtle fill, while higher power can dominate the scene.
Start by exposing for the ambient light first—set your shutter speed, aperture, and ISO so the background looks how you want. Then, add flash to illuminate your subject. Adjust flash power as needed to achieve the desired balance.
Creative Effects: Motion, Freeze, and Visual Rhythm
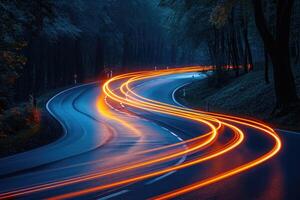
One of the most exciting aspects of combining flash with ambient light is the ability to create images that show both motion and sharpness. For example, when photographing moving cars at night, a slow shutter captures the light trails from headlights and taillights, while a flash freezes the car itself in sharp detail. This technique is also useful for portraits in low light, where you want to capture the background atmosphere but keep your subject crisp.
For more inspiration on using light to create movement and flow in your images, check out our article on using light for visual rhythm.
- Rear Curtain Sync: Triggering the flash at the end of the exposure (instead of the start) can create more natural-looking motion trails behind your subject.
- Dragging the Shutter: Using a slower shutter speed than normal for flash photography allows more ambient light and motion blur into the frame. This technique is often used in dance, nightlife, and creative portraiture.
Practical Tips for Balancing Flash and Ambient Light
- Use Manual Mode: Manual settings give you the most control over exposure. Set your ambient exposure first, then add flash.
- Modify Your Flash: Soften the light with a diffuser or bounce it off a wall or ceiling for more natural results.
- Watch for Color Temperature: Ambient and flash may have different color temperatures. Use gels on your flash or adjust white balance to match the scene.
- Test and Adjust: Take test shots and review the histogram. Adjust flash power, shutter speed, or ISO as needed.
- Consider Subject Movement: If your subject is moving, use a faster shutter or rear curtain sync to keep them sharp while still capturing ambient effects.
For more on capturing movement, see our guide on how to photograph car motion, which covers techniques for both natural and artificial lighting.
Common Challenges and How to Overcome Them
Blending flash with the existing light can be tricky, especially in changing or low-light environments. Here are some common issues and solutions:
- Overexposed Background: If the background is too bright, increase your shutter speed (within sync limits) or lower your ISO.
- Harsh Flash Shadows: Use a diffuser, bounce the flash, or move it off-camera for softer light.
- Color Mismatch: Correct with gels or adjust your camera’s white balance to unify the look of ambient and flash.
- Subject Too Dark: Increase flash power, open your aperture, or bring the flash closer to your subject.
Mastering these adjustments takes practice, but the results are worth the effort. For a deeper dive into the science and artistry of lighting, you may find this comprehensive overview of photography lighting helpful.
Advanced Techniques for Creative Results
Once you’re comfortable with the basics, try experimenting with more advanced methods:
- Multiple Flashes: Use more than one flash to light different parts of your scene or add rim and background lights.
- Gels and Color Effects: Add colored gels to your flash for dramatic or corrective effects.
- Long Exposures: Combine flash with very slow shutter speeds for surreal, painterly images. For inspiration, see our article on using long exposure for water.
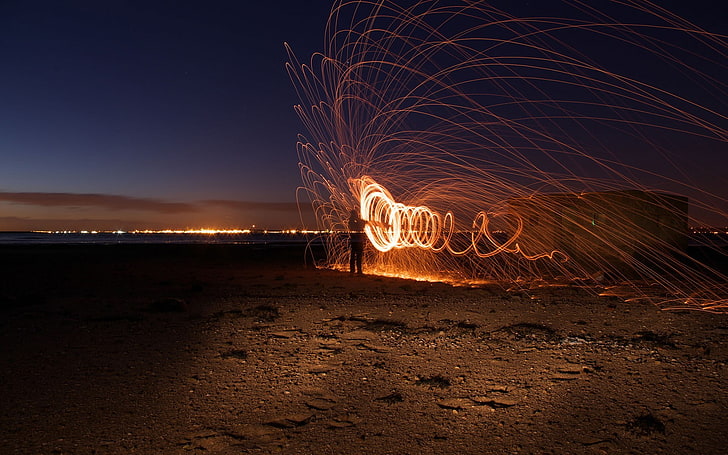
- Light Painting: Move a light source through your scene during a long exposure, then use flash to freeze your subject at the end.
Experimenting with these techniques can lead to unique and memorable photographs that stand out from standard flash or ambient-only shots.
FAQ
How do I avoid harsh shadows when using flash with ambient light?
To minimize harsh shadows, try diffusing your flash with a softbox or bouncing it off a nearby surface. Moving the flash off-camera and adjusting its angle can also help create more natural, flattering light.
What is the best shutter speed for combining flash and ambient light?
The ideal shutter speed depends on your creative intent and the amount of ambient light you want to capture. Generally, slower shutter speeds (1/30s to 1/4s) allow more ambient light and motion blur, while faster speeds (up to your camera’s sync speed, usually 1/200s or 1/250s) reduce ambient influence and freeze action.
Can I use flash and ambient light outdoors during the day?
Absolutely. Using flash outdoors can fill in shadows on your subject’s face, balance backlighting, or add a pop of light in bright conditions. Lower your flash power and use modifiers for a subtle effect that blends naturally with sunlight.
This article contains affiliate links. We may earn a commission at no extra cost to you.
This article contains affiliate links. We may earn a commission at no extra cost to you.
This article contains affiliate links. We may earn a commission at no extra cost to you.
This article contains affiliate links. We may earn a commission at no extra cost to you.