

Light Metering Explained
Understanding how your camera measures light is essential for achieving well-exposed photographs. Light metering is the process by which a camera evaluates the brightness of a scene and determines the optimal exposure settings. Whether you shoot in manual or automatic modes, knowing how metering works can help you take control of your images and avoid common exposure mistakes.
This guide breaks down the essentials of light metering, explains the different metering modes, and offers practical advice for using them in real-world situations. You'll also find tips for troubleshooting tricky lighting conditions and links to related topics, such as creative exposure techniques that can further enhance your photography.
What Is Light Metering?
At its core, light metering refers to the method by which a camera assesses the available light in a scene to calculate the correct exposure. The camera’s built-in meter measures the intensity of light and suggests or sets the appropriate combination of shutter speed, aperture, and ISO. This process ensures that your photos are neither too bright (overexposed) nor too dark (underexposed).
Most modern cameras use sophisticated metering systems that analyze the scene in various ways. By understanding these systems, photographers can make informed decisions and override the camera’s choices when necessary. For more on how light affects your images, check out this comprehensive overview of light in photography.
Types of Metering Modes
Digital cameras typically offer several metering modes, each designed for specific situations. Here’s a breakdown of the most common options:
- Evaluative (Matrix) Metering: The camera divides the frame into multiple zones and evaluates light across the entire scene. It considers factors like subject position, background, and focus point. This is the default mode on most cameras and works well for general photography.
- Center-Weighted Metering: This mode gives priority to the light in the center of the frame while still considering the surrounding areas. It’s useful for portraits or scenes where the subject is centrally located.
- Spot Metering: The camera measures light in a very small area, usually around the selected focus point. Spot metering is ideal for high-contrast scenes or when you want precise control over exposure, such as when photographing a backlit subject.
- Partial Metering: Similar to spot metering but covers a slightly larger area, often used in some Canon cameras. It’s helpful when the subject occupies a moderate portion of the frame.
How Metering Affects Exposure
The way your camera interprets a scene through its metering system directly impacts the exposure settings it selects. For example, in a scene with bright highlights and deep shadows, evaluative metering will attempt to balance the exposure across the whole frame. However, this may result in some areas being too dark or too bright, depending on the subject and composition.
By choosing the appropriate metering mode, you can influence which parts of the image are correctly exposed. For instance, spot metering allows you to expose for a subject’s face even if the background is much brighter or darker. This is particularly useful in challenging lighting conditions, such as concerts, night scenes, or backlit portraits.
When to Use Different Metering Modes
Knowing when to switch metering modes can make a significant difference in your photography. Here are some practical scenarios:
- Evaluative/Matrix: Use this for landscapes, street photography, and general scenes where light is evenly distributed.
- Center-Weighted: Ideal for portraits or when your main subject is in the center and you want to ensure it’s properly exposed.
- Spot/Partial: Choose these modes for high-contrast scenes, such as a person against a bright sky, or when photographing small subjects in tricky lighting.
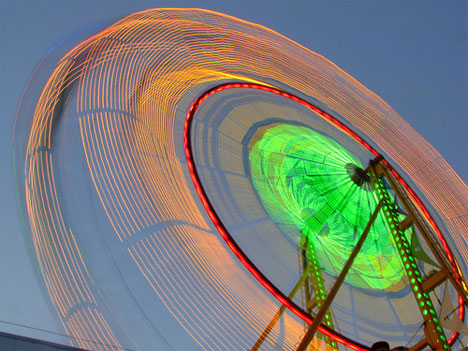
Experimenting with different metering options can help you develop a sense for which mode works best in various situations. If you’re interested in capturing dynamic scenes with moving lights, you might also enjoy reading about how to shoot moving lights.

Common Challenges and Solutions
Even with modern metering systems, certain lighting situations can confuse your camera’s sensor. Here are a few common challenges and how to address them:
- Backlighting: When your subject is in front of a bright light source, the camera may underexpose the subject. Use spot metering on the subject’s face or dial in positive exposure compensation.
- Snow or Beach Scenes: Bright backgrounds can trick the meter into underexposing. Increase exposure compensation to keep whites from looking gray.
- Night Photography: In low light, the meter may overexpose dark areas. Spot metering on a mid-tone or using manual exposure can help maintain mood and detail.
For more inspiration on working with light and movement, explore light and movement in city photography and discover creative ways to use exposure for artistic effects.
Tips for Mastering Exposure with Metering
To get the most out of your camera’s metering system, consider these practical tips:
- Always review your histogram and highlight warnings after taking a shot. This helps you catch exposure issues that the LCD preview might not reveal.
- Don’t hesitate to use exposure compensation. If your images are consistently too dark or too bright, adjust the exposure value (EV) to fine-tune the result.
- Practice using different metering modes in various lighting conditions. Over time, you’ll develop an intuition for which mode to use and when.
- Combine metering with manual adjustments for full creative control, especially in challenging or rapidly changing light.
Experimenting with these techniques can help you achieve consistent, well-exposed images, even in difficult scenarios. If you’re interested in pushing your creativity further, check out our guide on neon light photography for more inspiration.
Frequently Asked Questions
What is the difference between spot and evaluative metering?
Spot metering measures light in a very small area of the frame, usually around the selected focus point. This allows for precise exposure control, especially in high-contrast scenes. Evaluative (or matrix) metering, on the other hand, analyzes the entire frame and tries to balance exposure across all areas. Spot metering is best when you want to ensure a specific part of your image is correctly exposed, while evaluative is more general-purpose.
When should I use exposure compensation?
Exposure compensation is useful when your camera’s meter is consistently overexposing or underexposing your images. This often happens in scenes with lots of white (like snow) or black (like night photography), where the meter tries to render everything as a mid-tone gray. Adjusting the exposure value helps you correct for these situations and achieve the desired brightness.
Can I rely solely on my camera’s automatic metering?
While modern cameras have advanced metering systems, they can still be fooled by tricky lighting. It’s a good idea to understand how different modes work and to check your results using the histogram and highlight warnings. Manual adjustments and experience will help you get the best results, especially in challenging conditions.
Mastering the basics of how your camera measures light is a key step toward taking better photos. By understanding and experimenting with different metering modes, you’ll gain more creative control and consistently achieve the exposures you want.
This article contains affiliate links. We may earn a commission at no extra cost to you.