

Directional vs Diffused Light
Understanding the differences between directional and diffused light is fundamental for anyone working with photography, videography, or visual arts. The way light behaves can dramatically affect the mood, clarity, and impact of an image. Whether you’re shooting portraits, landscapes, or creative motion shots, knowing how to control and use these two lighting types will help you achieve your desired results.
Both forms of illumination have unique characteristics and applications. Directional light creates strong shadows and highlights, emphasizing texture and shape. In contrast, diffused light softens shadows, reducing contrast and producing a more even, gentle look. Mastering these lighting techniques is essential for creative control and technical excellence.
To further enhance your understanding of lighting, you might also explore using light for visual rhythm, which discusses how light patterns can guide the viewer’s eye and create dynamic energy in your compositions.
What Is Directional Light?
Directional light refers to illumination that travels in a specific path, typically from a single source. This type of lighting is characterized by its ability to cast distinct, hard-edged shadows and create high-contrast scenes. Common examples include sunlight on a clear day, a spotlight, or a flash without a diffuser.
- Hard shadows: The edges of shadows are sharp and well-defined.
- High contrast: There is a noticeable difference between the lit and shadowed areas.
- Emphasizes texture: Surfaces and details become more pronounced.
Directional lighting is often used to create drama, highlight form, or add depth to a photograph. For instance, in portraiture, it can sculpt facial features and bring out character. In landscape photography, it can emphasize the contours of hills or the texture of rocks.
Understanding Diffused Light
Diffused light is produced when illumination passes through a material or is reflected off a surface, scattering the rays and softening their effect. This results in gentle, gradual transitions between light and shadow, with minimal harshness. Overcast skies, shaded areas, and light bounced off a white wall are all sources of diffused illumination.
- Soft shadows: Shadow edges are gradual and less defined.
- Low contrast: The difference between highlights and shadows is reduced.
- Flattering for portraits: Skin tones appear smoother and blemishes are minimized.
Diffused lighting is ideal for situations where you want to minimize imperfections or create a calm, even look. It’s commonly used in product photography, macro shots, and portraiture to produce pleasing, natural results.
Comparing Directional and Diffused Lighting Effects
The choice between these two types of illumination depends on your creative goals and the subject you’re photographing. Here’s a quick comparison to help clarify their differences:
| Aspect | Directional Light | Diffused Light |
|---|---|---|
| Shadow Quality | Hard-edged, defined | Soft, gradual |
| Contrast | High | Low |
| Texture Emphasis | Strong | Subtle |
| Best For | Drama, shape, mood | Portraits, products, soft looks |
For more inspiration on creative lighting, check out creative use of blur and sharpness to see how light interacts with focus and movement in photography.
How to Create Directional and Diffused Light
Controlling the quality of illumination in your images is easier than you might think. Here are some practical ways to achieve each effect:
Techniques for Directional Lighting
- Use a bare bulb, flash, or spotlight aimed directly at your subject.
- Shoot during early morning or late afternoon when sunlight is angled and strong.
- Position your subject near a window with direct sunlight.
- Utilize reflectors to bounce light in a specific direction for added emphasis.
Methods for Diffusing Light
- Place a softbox, umbrella, or diffuser in front of your light source.
- Shoot on cloudy days or in shaded areas for naturally soft illumination.
- Bounce light off a white wall or ceiling to scatter rays and reduce harshness.
- Use translucent materials like curtains or frosted plastic to soften direct beams.
Experimenting with these setups will help you understand how each approach affects your images. The right choice depends on the story you want to tell and the mood you wish to convey.

When to Use Each Lighting Style
Choosing between hard and soft illumination is not just a technical decision—it’s a creative one. Here are some scenarios where each style excels:
- Directional: Use when you want to emphasize shape, create drama, or highlight texture. It’s great for black-and-white photography, architectural shots, or moody portraits.
- Diffused: Opt for this when you need flattering, even light, such as for headshots, product photography, or macro work. It’s also helpful in reducing glare and minimizing harsh reflections.
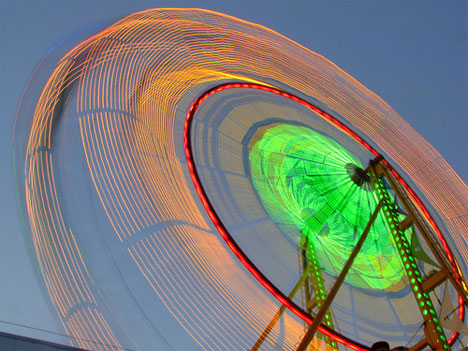
For those interested in motion and long exposures, you can learn more about techniques in creative slow shutter shots and how to photograph car motion. These guides offer tips on combining lighting with movement for unique effects.
Tips for Mastering Lighting in Photography
- Observe natural light throughout the day to see how its quality changes.
- Experiment with modifiers like diffusers, reflectors, and gels to shape your light.
- Combine both hard and soft sources for layered, dynamic images.
- Pay attention to your subject’s features and the story you want to tell.
- Review your images and adjust your setup to achieve the desired effect.
Lighting is a powerful tool in any visual artist’s kit. By understanding the principles of directional vs diffused light, you’ll gain greater control over your creative process and produce more compelling images.
If you want to deepen your knowledge, consider reading about the importance of light in photography for a broader perspective on how illumination shapes visual storytelling.
Frequently Asked Questions
What is the main difference between directional and diffused light?
The primary distinction lies in the quality of shadows and contrast. Directional illumination creates hard, well-defined shadows and high contrast, while diffused sources produce soft, gradual shadows and lower contrast, resulting in a more even and gentle appearance.
How can I make my light more diffused for portrait photography?
To soften your lighting, use modifiers such as softboxes, umbrellas, or diffusion panels. Shooting in shaded areas or on overcast days also helps, as does bouncing light off a white surface to scatter and soften the rays.
When should I use directional lighting instead of diffused lighting?
Choose directional lighting when you want to emphasize texture, shape, or create a dramatic effect. It’s ideal for artistic portraits, architectural photos, and situations where you want to highlight form and structure. Diffused lighting is better for flattering, even results, especially in portraits and product photography.
This article contains affiliate links. We may earn a commission at no extra cost to you.
This article contains affiliate links. We may earn a commission at no extra cost to you.
This article contains affiliate links. We may earn a commission at no extra cost to you.
This article contains affiliate links. We may earn a commission at no extra cost to you.