

Car Light Trails Photography
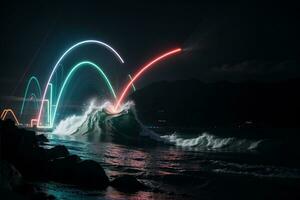
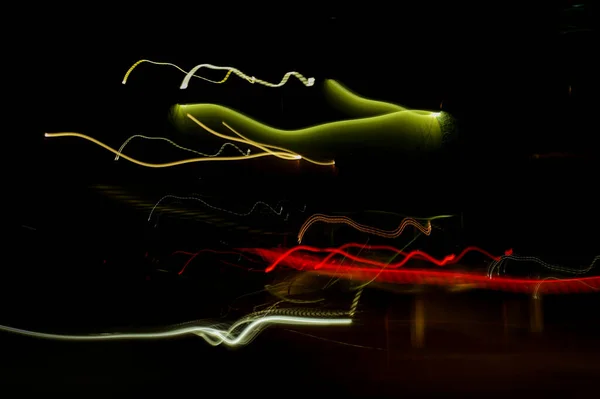
Car light trails photography is a captivating technique that transforms moving vehicles into streams of color and energy. By using long exposure settings, photographers can capture the dynamic movement of headlights and taillights, turning ordinary roads into vibrant works of art. This approach not only highlights the beauty of motion but also allows for creative expression in urban and rural settings alike.
Mastering this style requires an understanding of camera settings, timing, and composition. Whether you're a beginner or an experienced photographer, learning how to create these luminous trails can add a new dimension to your portfolio. For those interested in exploring related creative techniques, consider reading about creative use of blur and sharpness to further enhance your images.
Understanding the Basics of Light Trails
At its core, capturing car trails involves using a slow shutter speed to record the movement of lights over time. When vehicles pass through the frame, their lights create continuous lines, while stationary elements remain sharp. This contrast between motion and stillness is what makes these images so visually striking.
Key factors to consider include:
- Shutter speed: Longer exposures (typically several seconds) are necessary to capture the full path of moving lights.
- Aperture: A smaller aperture (higher f-number) helps maintain sharpness and control exposure, especially in well-lit environments.
- ISO: Use a low ISO to minimize noise, as long exposures can increase grain in your photos.
For a deeper dive into the role of illumination in photography, check out this resource on the importance of light in photography.
Essential Gear for Capturing Moving Lights
While you don't need the most expensive equipment, certain tools make it easier to achieve crisp, vibrant results:
- Camera with manual mode: Allows full control over shutter speed, aperture, and ISO.
- Sturdy tripod: Prevents camera shake during long exposures.
- Remote shutter release or timer: Reduces the risk of blur from pressing the shutter button.
- Wide-angle lens: Captures more of the scene and emphasizes the scale of the trails.
Accessories like lens hoods and ND filters can also help manage stray light and exposure, especially in urban environments with varying brightness levels.
Choosing the Right Location and Timing
Location is crucial for successful light trail images. Look for spots with steady traffic flow, such as busy intersections, highways, or bridges. Elevated positions—like overpasses or parking garages—offer unique perspectives and minimize obstructions.
Timing matters as well. Blue hour (shortly after sunset or before sunrise) provides a balanced mix of ambient light and vivid trails. Shooting too late at night may result in overly dark backgrounds, while too much daylight can overpower the effect. Experiment with different times to find the look you prefer.
For those interested in other motion-based techniques, the article on how to photograph car motion offers additional tips for dynamic vehicle photography.
Camera Settings for Stunning Car Light Effects
Getting the technical details right is essential for producing clean, vibrant trails. Here’s a step-by-step approach:
- Set your camera to manual mode.
- Choose a low ISO (100–400) to minimize noise.
- Select a small aperture (f/8–f/16) for greater depth of field and sharpness.
- Adjust the shutter speed based on traffic speed and desired trail length—start with 5–30 seconds and experiment.
- Use manual focus to ensure sharpness on stationary elements.
Review your images and adjust settings as needed. If your photos are too bright, use a smaller aperture or lower ISO. If trails are too short, increase the exposure time.
For more on using exposure creatively, see the guide on using long exposure for water, which covers similar principles in a different context.
Creative Techniques for Unique Light Trail Images
Once you’re comfortable with the basics, try these ideas to make your images stand out:
- Incorporate reflections: Wet roads or puddles can double the impact of the trails.
- Frame with foreground elements: Use railings, trees, or architecture to add depth.
- Experiment with angles: Shooting from above, below, or around curves creates dynamic compositions.
- Blend multiple exposures: Combine several shots in post-processing for denser, more intricate patterns.
Understanding how to use light for visual rhythm can further enhance your compositions. Explore more on this topic in the article about using light for visual rhythm.
Common Challenges and How to Overcome Them
Even with careful planning, you may encounter some obstacles when photographing moving lights:
- Camera shake: Always use a tripod and remote shutter release or timer to avoid blur.
- Overexposure: Reduce ISO, use a smaller aperture, or add an ND filter if your images are too bright.
- Unwanted elements: Scout your location ahead of time to avoid distracting objects or stray lights.
- Weather conditions: Rain can add reflections, but wind may shake your camera. Be prepared for changing conditions.
Patience and experimentation are key. Each scene is unique, and small adjustments can make a big difference in your results.
Post-Processing Tips for Enhanced Results
Editing your images can help bring out the best in your light trail photos. Consider these steps:
- Adjust contrast and clarity: Enhance the separation between trails and background.
- Boost saturation: Make colors pop without overdoing it.
- Crop and straighten: Refine your composition for maximum impact.
- Remove distractions: Use spot healing or cloning tools to eliminate unwanted elements.
Remember, subtle edits often yield the most natural and striking results. For more on managing brightness and exposure, see the article on light intensity photography.
Frequently Asked Questions
What camera settings work best for photographing moving vehicle lights?
Start with manual mode, a low ISO (100–400), a small aperture (f/8–f/16), and a long shutter speed (5–30 seconds). Adjust based on your environment and desired effect.
Can I capture light trails without a tripod?
While it's possible to stabilize your camera on a solid surface, a tripod is highly recommended for sharp, blur-free images during long exposures.
What time of day is ideal for this style of photography?
Blue hour—just after sunset or before sunrise—offers the best balance of ambient light and vivid trails. However, experimenting at different times can yield unique results.
How can I make my light trail images more creative?
Try incorporating reflections, using interesting foregrounds, experimenting with angles, or blending multiple exposures for more complex patterns.
This article contains affiliate links. We may earn a commission at no extra cost to you.
This article contains affiliate links. We may earn a commission at no extra cost to you.
This article contains affiliate links. We may earn a commission at no extra cost to you.
This article contains affiliate links. We may earn a commission at no extra cost to you.