

Backlighting in Photography
Backlighting in photography is a creative lighting technique that places the main light source behind the subject, facing toward the camera. This approach can produce striking visual effects, such as glowing edges, dramatic silhouettes, and a sense of depth that is difficult to achieve with front or side lighting. Whether you are photographing people, landscapes, or still life, understanding how to use backlight effectively can elevate your images and add a new dimension to your work.
Photographers often use this method to highlight shapes, create mood, and emphasize textures. However, mastering this technique requires a solid grasp of exposure, composition, and light control. In this article, you'll find practical tips, examples, and answers to common questions about working with light from behind your subject.
If you’re interested in exploring how light can shape your images in other ways, check out using light for visual rhythm for more inspiration on creative lighting techniques.
Understanding the Impact of Backlight on Photographs
When the primary light source is positioned behind your subject, it can create a variety of effects depending on the intensity and angle of the light, as well as your camera settings. Some of the most common results include:
- Silhouettes: When the subject is underexposed against a bright background, you get a strong outline with little or no detail inside the shape.
- Rim Lighting: The edges of the subject are illuminated, creating a glowing outline that separates it from the background.
- Translucency: Backlight can make semi-transparent objects like leaves, fabric, or hair glow, revealing intricate details and colors.
- Atmospheric Effects: Shooting toward the light can introduce lens flare, haze, or a dreamy, ethereal quality to your images.
The key to successful backlit photos is understanding how to control exposure and manage contrast. This often involves making deliberate choices about metering, using reflectors or fill flash, and sometimes embracing the unpredictability of light leaks and flares.
Techniques for Achieving Striking Backlit Images
To make the most of backlighting, consider these practical steps:
- Expose for Your Subject: Use spot or center-weighted metering to ensure your subject is properly exposed, even if the background becomes overexposed or blown out.
- Use a Reflector or Fill Flash: To avoid losing detail in the shadows, bounce light back onto your subject with a reflector or add a subtle fill flash.
- Control Lens Flare: While lens flare can add artistic flair, it can also reduce contrast and sharpness. Use a lens hood or your hand to block direct sunlight from hitting the lens, or embrace the flare for a creative effect.
- Experiment with Angles: Move around your subject to find the best angle for the light. Sometimes a slight shift can dramatically change the mood and impact of your photo.
- Adjust White Balance: Backlighting can create warm or cool color casts. Set your white balance manually or in post-processing to achieve the desired look.
For more on how light intensity and direction affect your images, you might find the article on light intensity photography helpful.

When and Where to Use Backlight in Your Photography
The best times to experiment with light from behind your subject are during the "golden hour"—shortly after sunrise or before sunset—when the sun is low and produces a soft, warm glow. However, you can use this approach in a variety of settings:
- Portraits: Backlight can create beautiful rim lighting around hair and shoulders, adding separation and a dreamy effect.
- Nature and Landscapes: Leaves, flowers, and water can appear luminous when illuminated from behind, revealing textures and colors not visible with front lighting.
- Still Life and Product Photography: Translucent materials like glass, fabric, or liquids can be made to glow, highlighting their unique properties.
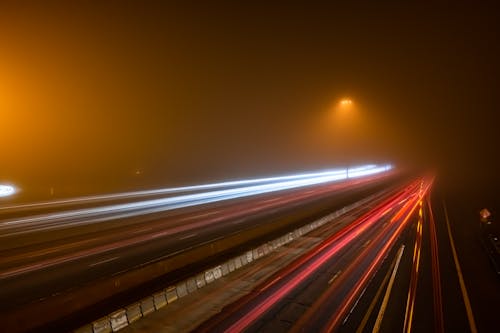
- Action and Motion: Backlight can emphasize movement, especially when combined with techniques like panning or long exposure. For example, you can learn more about capturing dynamic scenes in the guide on how to photograph car motion.
Indoor environments with large windows or artificial lights can also provide opportunities for creative backlighting. The key is to look for situations where the light source is positioned behind your subject relative to the camera.
Common Challenges and Solutions When Shooting with Backlight
While this lighting style can be visually stunning, it also presents some technical challenges. Here are a few common issues and how to address them:
- Loss of Detail in Shadows: Use a reflector, fill flash, or adjust your exposure compensation to bring back detail in the darker areas of your subject.
- Blown-Out Highlights: Keep an eye on your histogram and bracket your exposures if necessary. Sometimes, letting the background blow out is a stylistic choice, but be mindful of losing important information.
- Lens Flare and Haze: Clean your lens regularly and use a lens hood. If you want to minimize flare, try blocking direct sunlight with your hand or another object just outside the frame.
- Focusing Difficulties: Autofocus systems can struggle when shooting into the light. Switch to manual focus or focus on a high-contrast edge of your subject.
For additional creative ideas, consider exploring creative use of blur and sharpness to complement your backlit images.
Creative Inspiration and Advanced Tips
Once you’re comfortable with the basics, try experimenting with more advanced techniques:
- Double Exposure: Combine a backlit silhouette with another image for a surreal effect.
- Intentional Lens Flare: Use flare as a compositional element to draw attention or add atmosphere.
- Color Gels: Place colored gels over your light source for unique background hues.
- Layering: Incorporate foreground elements, like leaves or glass, to add depth and complexity to your composition.
For a deeper understanding of how light shapes your photos, the guide to light in photography provides valuable insights into the role of illumination in composition and design.
FAQ: Backlighting Techniques and Troubleshooting
What camera settings work best for backlit scenes?
Start with manual mode or exposure compensation to avoid underexposing your subject. Use spot metering to measure light on your subject’s face or main area of interest. Adjust ISO, aperture, and shutter speed to balance background brightness with subject detail.
How do I avoid unwanted lens flare?
Use a lens hood, shade your lens with your hand, or reposition yourself so the light source is just outside the frame. If you want to include flare for artistic reasons, experiment with different angles and apertures to control its appearance.
Can I use backlighting indoors?
Yes, window light is an excellent source for indoor backlighting. Position your subject between the window and your camera. You can also use artificial lights behind your subject for a similar effect.
How does backlight affect color and contrast?
Backlighting can reduce contrast and wash out colors, especially if the light is very strong. Adjust your white balance and consider using post-processing to restore color vibrancy and contrast.
What subjects work best with this lighting style?
People, plants, glass, water, and anything with interesting edges or translucency are ideal. Experiment with different materials and shapes to discover what works best for your style.
Mastering backlighting in photography opens up a world of creative possibilities. By understanding how to control exposure, manage contrast, and use light intentionally, you can produce images that are both visually compelling and technically strong. Keep experimenting, and let the light guide your creativity.
This article contains affiliate links. We may earn a commission at no extra cost to you.
This article contains affiliate links. We may earn a commission at no extra cost to you.
This article contains affiliate links. We may earn a commission at no extra cost to you.
This article contains affiliate links. We may earn a commission at no extra cost to you.