

How to Use Continuous Light
Understanding how to use continuous light is essential for photographers and videographers seeking greater control over their lighting environment. Unlike flash or strobe lighting, continuous sources provide a steady, visible output, making it easier to preview and adjust the effects in real time. Whether you’re shooting portraits, products, or creative scenes, mastering this lighting approach can elevate the quality and consistency of your work.
Continuous lighting is especially useful for beginners, as it removes much of the guesswork from exposure and composition. You can see exactly how shadows and highlights fall on your subject, allowing for more intuitive adjustments. Before diving into techniques and setups, it’s helpful to understand the basics and advantages of this lighting method.
For those interested in exploring how light direction impacts your images, check out this resource on direction of light in photography. Understanding these fundamentals will help you make the most of continuous sources.
What Is Continuous Lighting?
Continuous lighting refers to any light source that remains on throughout your shoot, as opposed to flashes that emit brief bursts. Common examples include LED panels, tungsten bulbs, fluorescent tubes, and even household lamps. These lights are popular in both photography and video production because they allow you to see the lighting effect live, making it easier to compose and adjust your scene.
Some of the main benefits of using continuous sources include:
- Real-time feedback – You can instantly see how your lighting setup affects your subject and background.
- Ease of use – There’s no need to sync with your camera or worry about recycle times.
- Versatility – Suitable for both stills and video, and can be combined with natural light.
Setting Up Your Continuous Lighting
To get started, you’ll need at least one continuous light source, a stand or support, and potentially modifiers like softboxes or reflectors. Here are some steps to guide your setup:
- Choose the right light: LEDs are energy-efficient, cool to the touch, and available in various color temperatures. Tungsten lights offer a warm tone but can get hot. Select a light that fits your needs and shooting environment.
- Position your light: Place your main light at a 45-degree angle to your subject for a classic look. Adjust the height and distance to control shadow length and intensity.
- Modify the light: Use a softbox or umbrella to diffuse harsh light and create softer shadows. Reflectors can bounce light back onto your subject, filling in dark areas.
- Balance with ambient light: If you’re working in a room with windows or other light sources, adjust your continuous light’s intensity or color temperature to match or complement the existing light.
Camera Settings for Continuous Light
One of the advantages of working with steady illumination is that you can fine-tune your camera settings while observing the results in real time. Here’s how to optimize your exposure:
- ISO: Start with a low ISO (100–400) for minimal noise. If your light isn’t bright enough, increase ISO as needed.
- Aperture: A wider aperture (lower f-number) lets in more light and creates a shallow depth of field. For group shots or more detail, use a smaller aperture.
- Shutter speed: Since continuous lights are not as powerful as flashes, you may need slower shutter speeds. Use a tripod to avoid blur, especially in low-light situations.
- White balance: Set your camera’s white balance to match the color temperature of your lights (e.g., daylight, tungsten, or custom Kelvin setting) for accurate colors.
For more on how aperture affects motion and blur, see the guide on aperture and motion blur.
Creative Techniques With Continuous Lighting
Once you’re comfortable with the basics, you can experiment with a variety of creative effects using continuous sources:
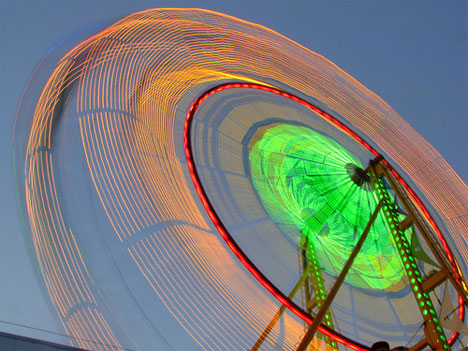
- Light painting: Move a light source during a long exposure to create trails and patterns.
- Backlighting: Place your light behind the subject for dramatic silhouettes or glowing edges.
- Mixed lighting: Combine continuous sources with natural or ambient light for unique color blends.
- Motion blur: Use slow shutter speeds to capture movement, which is easier to control with steady illumination.
To learn more about combining lighting and movement, explore this article on balancing light and motion.
Tips for Better Results With Steady Illumination
Getting the most out of your lighting setup involves more than just turning on a lamp. Here are some practical tips:
- Use multiple lights for more control over shadows and highlights. A basic three-light setup (key, fill, and backlight) can add depth and dimension.
- Control spill by using flags or barn doors to prevent unwanted light from hitting the background or camera lens.
- Experiment with color gels to add creative hues or correct color temperature mismatches.
- Keep your lights cool – LEDs are preferable for long sessions, as they generate less heat than tungsten bulbs.
- Check for flicker when using certain types of bulbs, especially with video. Modern LEDs designed for photography typically avoid this issue.
For those interested in capturing dynamic effects, you might enjoy reading about how to capture light trails using continuous sources and long exposures.

Common Mistakes to Avoid When Working With Continuous Sources
Even though steady lighting is straightforward, there are a few pitfalls to watch out for:
- Insufficient power: Many continuous lights are less powerful than flashes. Make sure your lights are bright enough for your intended aperture and ISO settings.
- Ignoring color temperature: Mismatched lights can cause color casts. Always check and adjust your white balance.
- Unwanted shadows: Without modifiers, direct light can create harsh shadows. Use diffusion to soften the effect.
- Overheating: Some bulbs, especially tungsten, can get very hot. Allow for ventilation and avoid touching hot surfaces.
For more advanced lighting strategies, you can read about the science and art of photography lighting for deeper insights into how professionals approach illumination.
Integrating Continuous Lighting Into Your Workflow
Consistent lighting is valuable for a wide range of genres, from portraiture and product photography to video interviews and creative projects. Here’s how to make it part of your regular process:
- Set up your lights before your subject arrives to save time and ensure a smooth session.
- Test different angles and modifiers to find the most flattering look for your subject or product.
- Review your images on a calibrated monitor to check for color accuracy and exposure consistency.
- Keep notes on your favorite setups for future reference, especially if you shoot in the same location regularly.
If you want to freeze action with continuous sources, see the article on freezing motion in photography for tips on balancing exposure and movement.
FAQ
Is continuous lighting better than flash for beginners?
For those just starting out, steady illumination is often easier to use because you can see the effect in real time. It helps beginners understand how light shapes a subject and makes it simpler to adjust exposure and composition on the fly.
Can I use household lamps as continuous lights?
Yes, you can use household lamps, but professional continuous lights offer more control over brightness and color temperature. If you use regular lamps, be mindful of their color cast and intensity, and consider using diffusion materials to soften the light.
How do I avoid color casts with continuous lighting?
To prevent unwanted color shifts, match your camera’s white balance to your light’s color temperature. Using lights with adjustable color temperature or adding color correction gels can also help achieve accurate colors.
What are some creative uses for continuous lighting?
Continuous sources are great for light painting, creating motion blur, and experimenting with mixed lighting setups. Their steady output makes them ideal for both photography and video, allowing for creative effects that are difficult to achieve with flash alone.
This article contains affiliate links. We may earn a commission at no extra cost to you.