

Understanding Exposure Time
Exposure time is a fundamental concept in photography that directly impacts how your images appear. Whether you’re a beginner learning the basics or an enthusiast looking to refine your technique, grasping how shutter duration affects your photos is essential for creative control. This guide will break down the mechanics, practical applications, and artistic possibilities of manipulating exposure duration, helping you achieve the results you envision.
At its core, exposure time refers to the length of time your camera’s sensor or film is exposed to light. This setting determines how much light reaches the sensor, influencing image brightness, motion blur, and overall sharpness. Mastering this aspect of photography unlocks a wide range of creative effects, from freezing fast action to capturing smooth, dreamy motion.
For those interested in exploring related techniques, check out our guide on long exposure night shots to see how extended shutter speeds can transform nighttime photography.
What Is Exposure Time and Why Does It Matter?
Exposure time, often called shutter speed, is the interval during which your camera’s shutter remains open to allow light onto the sensor. It’s measured in seconds or fractions of a second, such as 1/1000s (very fast) or 2s (very slow). The choice of duration affects both the technical and artistic qualities of your image.
- Short exposure times (fast shutter speeds) freeze motion, ideal for sports or wildlife photography.
- Long exposure times (slow shutter speeds) create motion blur, useful for capturing flowing water, light trails, or low-light scenes.
Understanding how to balance this setting with other exposure factors—like aperture and ISO—forms the foundation of manual photography. By adjusting shutter duration, you can control whether movement appears crisp or blurred, and how much light is recorded in your image.
How Shutter Duration Influences Your Photos
The impact of exposure time on your images is profound. Here’s how varying this setting changes the outcome:
- Freezing Action: Using a fast shutter speed (e.g., 1/1000s) captures sharp, detailed images of moving subjects, such as athletes or birds in flight.
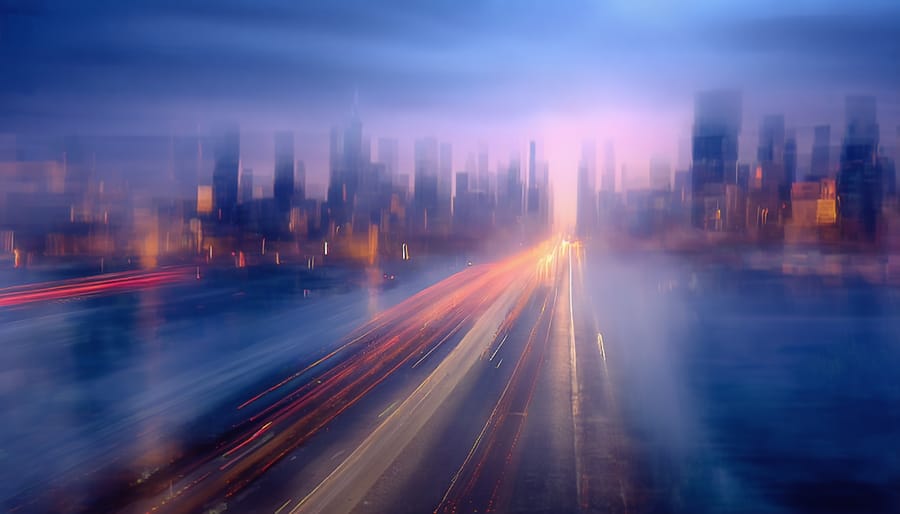
- Capturing Motion: Slower shutter speeds (e.g., 1/30s or longer) introduce blur, conveying a sense of movement—perfect for waterfalls, car lights, or bustling city scenes.
- Low Light Performance: In dim conditions, longer exposure times allow more light to reach the sensor, making handheld shots trickier but enabling night photography or star trails.
To see creative uses of motion blur in nature, explore our article on motion photography in nature.
Balancing Exposure: Shutter Speed, Aperture, and ISO
Exposure is a balancing act between three main camera settings: shutter speed, aperture, and ISO. Adjusting one often requires compensating with another to maintain proper brightness. For example, if you slow down your shutter to let in more light, you might need to use a smaller aperture (higher f-number) or lower ISO to avoid overexposure.
Here’s a quick overview:
| Setting | Effect on Exposure | Creative Impact |
|---|---|---|
| Shutter Speed | Controls how long light hits the sensor | Motion blur or freeze |
| Aperture | Regulates how much light enters | Depth of field |
| ISO | Sensitivity of sensor to light | Image noise |
Mastering the interplay between these settings allows you to adapt to different lighting conditions and creative goals. For a deeper dive into lighting, see our resource on understanding strobe lighting.
Creative Techniques Using Different Exposure Durations
Once you’re comfortable with the basics, experimenting with various shutter speeds opens up a world of creative possibilities:
- Light Trails: Use long exposures at night to capture the movement of car headlights or city lights.
- Silky Water: Slow shutter speeds (1/2s or longer) make waterfalls and rivers appear smooth and ethereal.
- Intentional Blur: Panning your camera with a moving subject while using a slower shutter can create dynamic, energetic images.
- Star Trails: Extremely long exposures (minutes or hours) record the movement of stars across the sky.
For more inspiration on dramatic effects, our article on capturing lightning photography demonstrates how precise timing and exposure settings can yield stunning results.

Common Challenges and How to Overcome Them
Manipulating exposure time can introduce technical challenges. Here are some common issues and solutions:
- Camera Shake: Longer exposures increase the risk of blurry images due to hand movement. Use a tripod or image stabilization to keep your camera steady.
- Overexposure: If your images are too bright, try using a faster shutter speed, a smaller aperture, or a lower ISO.
- Underexposure: In dark environments, lengthen your exposure or increase ISO, but be mindful of noise.
- Motion Blur: If you want sharp images of moving subjects, opt for a faster shutter speed and increase ISO or open the aperture to compensate for reduced light.
Lighting plays a crucial role in exposure. For a deeper understanding of how light interacts with your camera settings, refer to this comprehensive guide on the importance of light in photography.
Tips for Mastering Shutter Speed
Here are some practical tips to help you gain confidence in controlling exposure time:
- Start in Shutter Priority Mode: Many cameras offer a mode (often labeled “S” or “Tv”) that lets you set the shutter speed while the camera chooses aperture. This is a great way to experiment.
- Use a Tripod for Long Exposures: Stability is key when working with slow shutter speeds to avoid unwanted blur.
- Check Your Histogram: Use your camera’s histogram to ensure you’re not losing detail in shadows or highlights.
- Practice with Moving Subjects: Try photographing cars, people, or water to see how different settings affect the outcome.
- Experiment with Filters: Neutral density (ND) filters let you use longer exposures even in bright conditions.
For those setting up a home or studio lighting system, our softbox lighting setup guide can help you achieve consistent results when experimenting with various shutter speeds.
FAQ
What is the difference between exposure time and shutter speed?
Both terms refer to the same concept: the duration the camera’s shutter remains open to let light reach the sensor. “Shutter speed” is the more common term in camera menus, while “exposure time” is often used in technical discussions.
How do I know which shutter speed to use?
The ideal shutter speed depends on your subject and creative intent. Use faster speeds (like 1/1000s) to freeze motion, and slower speeds (like 1/30s or longer) to capture blur or work in low light. Practice and reviewing your results will help you develop an instinct for the right settings.
Can I adjust exposure time on my smartphone?
Many modern smartphones offer manual controls or “Pro” modes that let you set shutter speed. Look for these options in your camera app, or try third-party apps that provide more advanced controls.
Why are my long exposure photos blurry?
Blurriness in long exposures is usually caused by camera shake. Use a tripod, remote shutter release, or your camera’s timer to minimize movement during the shot.
How does lighting affect exposure time?
Lighting conditions directly influence the shutter speed you can use. In bright light, you can use faster speeds. In low light, you may need to slow down the shutter or increase ISO to achieve a well-exposed image.
This article contains affiliate links. We may earn a commission at no extra cost to you.