

Shutter Speed and Light Control
Understanding shutter speed and light control is fundamental for anyone looking to improve their photography skills. These two concepts are at the heart of exposure, motion capture, and creative effects in images. Whether you’re shooting fast-moving subjects or aiming for dreamy long exposures, knowing how to balance these elements will help you achieve your desired results.
Both beginners and experienced photographers benefit from mastering the relationship between how long the camera’s sensor is exposed to light and how much illumination reaches it. This guide will break down the essentials, from technical definitions to practical tips, and provide links to related resources like aperture and motion blur for a deeper understanding of exposure.
What Is Shutter Speed?
Shutter speed refers to the length of time the camera’s shutter remains open, allowing light to hit the sensor. It’s measured in seconds or fractions of a second, such as 1/1000s (very fast) or 1s (slow). The choice of shutter duration has a direct impact on how motion is captured and how much light is recorded in your image.
- Fast shutter speeds (e.g., 1/1000s): Freeze action, ideal for sports or wildlife photography.
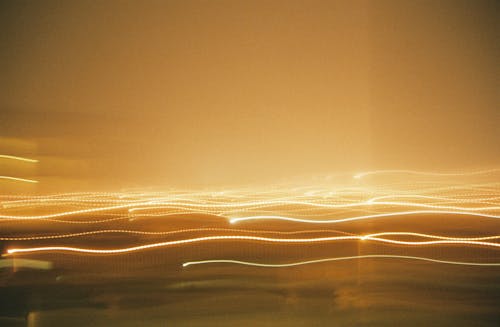
- Slow shutter speeds (e.g., 1/2s, 1s, or longer): Blur motion, useful for creative effects like light trails or smooth water.
Adjusting this setting is one of the most effective ways to control how movement appears in your photos. For more on capturing motion, see the how to photograph motion blur resource.
How Shutter Duration Affects Exposure
The amount of light entering the camera is determined by how long the shutter is open. A longer exposure lets in more light, which is useful in low-light situations. Conversely, a shorter exposure reduces the amount of light, preventing overexposure in bright conditions.
However, changing the shutter setting also affects motion. Too slow, and moving subjects become blurry; too fast, and you might not capture enough light. Balancing these factors is key to achieving the exposure and effect you want.

Light Control in Photography
Managing the amount and quality of light is just as important as setting the correct shutter duration. Light control involves not only the camera’s settings but also external factors such as natural sunlight, artificial lighting, and reflectors. The interplay between light and exposure time shapes the mood, clarity, and overall impact of your images.
For a deeper dive into the science and art of lighting, explore this comprehensive guide to mastering photographic lighting.
Balancing Shutter Duration and Light
To achieve the right exposure, photographers often adjust three main settings: shutter duration, aperture, and ISO. This trio is known as the exposure triangle. When you change one, you usually need to adjust the others to maintain balance:
- Slower shutter speeds require a smaller aperture or lower ISO to avoid overexposure.
- Faster shutter speeds may need a wider aperture or higher ISO to ensure enough light reaches the sensor.
For more on how aperture interacts with motion and exposure, see the article on aperture and motion blur.
Creative Effects Using Shutter and Light
Once you understand the basics, you can use shutter duration and light creatively. Here are a few popular techniques:
- Freezing fast action: Use a quick shutter to capture sharp images of moving subjects. This is essential for sports and wildlife photography. For tips, check out freezing motion in photography.
- Capturing motion blur: Slow down the shutter to create a sense of movement, such as flowing water or bustling city scenes.
- Long exposure photography: Extend the exposure time to several seconds or minutes for effects like light trails, star trails, or silky-smooth water. See long exposure photography tips for more techniques.
Tips for Mastering Exposure and Motion
Getting comfortable with exposure settings takes practice. Here are some practical tips to help you gain confidence:
- Use a tripod for slow shutter speeds to avoid camera shake and maintain sharpness in static areas.
- Experiment with different lighting conditions, from bright sunlight to dim interiors, to see how your camera responds.
- Review your images on the camera’s display and adjust settings as needed. Don’t be afraid to take multiple shots at different exposures.
- Try manual mode to gain full control over shutter, aperture, and ISO. This helps you understand the impact of each adjustment.
- Learn from examples in guides like the blue hour photography guide to see how pros balance exposure and light.
Common Challenges and Solutions
Even experienced photographers encounter difficulties when balancing exposure and motion. Here are some typical issues and how to address them:
| Challenge | Solution |
|---|---|
| Motion blur when you want sharpness | Increase shutter speed, use a tripod, or add more light to the scene. |
| Underexposed images | Slow down the shutter, widen the aperture, or raise the ISO. |
| Overexposed highlights | Use a faster shutter, narrow the aperture, or lower the ISO. |
| Unwanted noise in low light | Use the lowest ISO possible, stabilize the camera, and use longer exposures if needed. |
FAQ
What is the best shutter speed for low-light photography?
The ideal setting depends on your subject and whether you want to freeze motion or capture blur. For handheld shots in low light, try not to go slower than 1/60s to avoid camera shake. If you use a tripod, you can use much slower speeds to let in more light.
How does shutter duration affect image sharpness?
Shorter exposures help freeze action and reduce blur from camera movement, resulting in sharper images. Longer exposures can introduce blur from subject movement or camera shake, which can be used creatively or avoided with stabilization.
Can I use slow shutter speeds in bright daylight?
Yes, but you may need to use a smaller aperture (higher f-number) or a neutral density (ND) filter to prevent overexposure. ND filters reduce the amount of light entering the lens, allowing for longer exposures even in bright conditions.
By understanding and practicing the principles of shutter speed and light control, you’ll gain more creative control over your photography and be able to handle a wide range of lighting and motion scenarios with confidence.