

Shutter Drag Photography
Shutter drag photography is a creative technique that uses slow shutter speeds to capture motion and light trails in a single frame. By intentionally allowing the camera’s shutter to remain open longer, photographers can produce striking images that blend sharp subjects with dynamic blur, revealing the passage of time in a still photo. This approach is popular for night scenes, moving lights, and any situation where motion becomes a key visual element.
Learning to master this method opens up new artistic possibilities, whether you’re shooting cityscapes, fairgrounds, or experimenting with creative blur. Before diving into the technical steps, it’s helpful to see how this style fits within the broader world of motion-based photography. For more inspiration on incorporating movement into your images, check out using motion in still life, which explores similar concepts in a different context.
Understanding the Basics of Slow Shutter Techniques
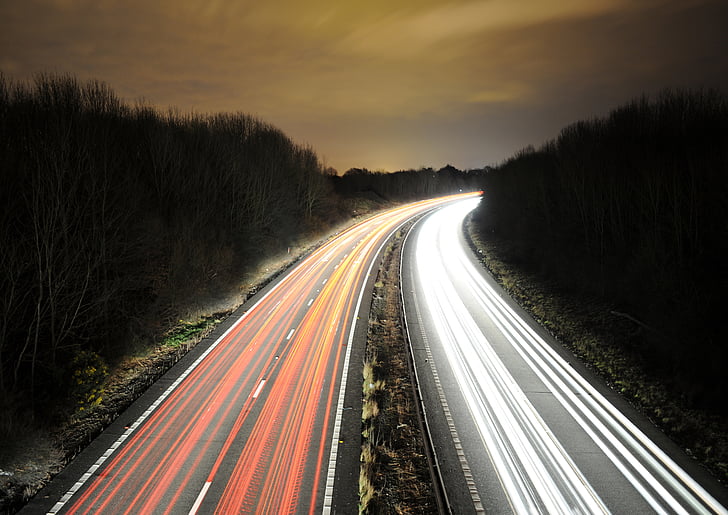
At its core, this technique revolves around using a slow shutter speed—typically anything slower than 1/30th of a second. When the shutter remains open longer, moving subjects or lights create streaks and trails, while stationary elements stay sharp if the camera is stable. This contrast between motion and stillness is what gives these images their unique energy.
Common scenarios for this approach include:
- Capturing light trails from cars at night
- Blurring crowds in busy urban environments
- Emphasizing movement in amusement parks or concerts
- Creating dreamy effects with flowing water or fireworks
To get started, you’ll need a camera with manual exposure controls, a sturdy tripod, and a willingness to experiment with different settings. Even smartphones with manual or “pro” modes can be used for basic experiments.
Essential Gear for Motion Blur Photography
While you don’t need a studio full of equipment, having the right tools makes a big difference when working with long exposures. Here’s what’s most helpful:
- Tripod: Keeps your camera steady to prevent unwanted blur in static parts of the image.
- Remote shutter release or timer: Minimizes camera shake when triggering the shot.
- Neutral density (ND) filter: Reduces the amount of light entering the lens, allowing for longer exposures even in bright conditions.
- Manual mode: Lets you control shutter speed, aperture, and ISO for precise results.
Lighting is also crucial. Understanding how light interacts with your subject and background will help you achieve the desired effect. For a deeper dive into the role of light in photography, visit the importance of light in photography.
How to Set Up Your Camera for Shutter Drag Effects
To create compelling images with this method, follow these steps:
- Mount your camera on a tripod to keep stationary elements sharp.
- Switch to manual or shutter priority mode.
- Choose a slow shutter speed—start with 1/2 to 2 seconds for visible motion blur.
- Adjust aperture and ISO to maintain proper exposure. Use a small aperture (high f-number) and low ISO to avoid overexposure.
- If shooting in bright light, attach an ND filter to further reduce exposure.
- Use a remote shutter release or the camera’s timer to avoid shaking the camera when pressing the shutter button.
Experiment with different shutter speeds to see how they affect the amount of blur. The longer the exposure, the more pronounced the motion trails will be.
Creative Ideas for Capturing Motion and Light Trails
There are countless ways to use slow shutter speeds for dramatic effect. Here are some popular approaches:
- Light painting: Move a light source (like a flashlight or glow stick) in front of the camera during a long exposure to “draw” patterns or words.
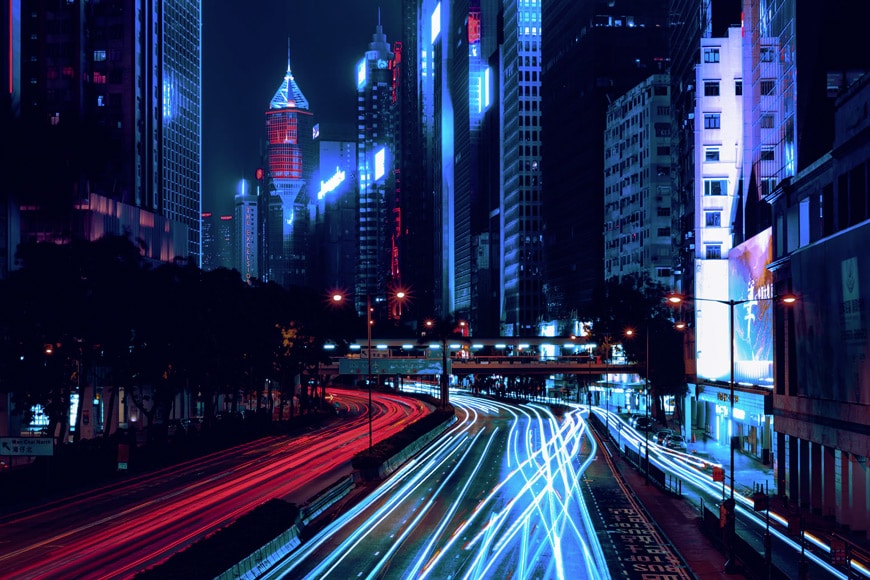
- City lights: Photograph traffic at night to create colorful streams of light. For more on this, see light and movement in city photography.
- Moving crowds: Capture busy streets or events to show the flow of people while keeping the background sharp.
- Waterfalls and rivers: Use slow shutter speeds to turn moving water into a silky, ethereal blur.
Timing and anticipation are key. Watch the scene, predict movement, and experiment with exposure times to get the effect you want.
Troubleshooting Common Issues in Long Exposure Photography
Working with slow shutter speeds can introduce some challenges. Here’s how to address the most common problems:
- Unwanted camera shake: Always use a tripod and remote shutter release or timer.
- Overexposed images: Use a smaller aperture, lower ISO, or add an ND filter to reduce light.
- Focus problems: Pre-focus on your subject before starting the exposure, then switch to manual focus to prevent the camera from refocusing.
- Noise in dark areas: Keep ISO as low as possible and use noise reduction in post-processing if needed.
Patience and practice are essential. Take multiple shots, review your results, and tweak your settings as you go.
Tips for Better Results with Motion Blur Techniques
To make the most of this creative style, keep these tips in mind:
- Scout your location in advance to find interesting light sources and backgrounds.
- Experiment with different shutter speeds to see how they affect the look of motion.
- Combine static and moving elements for more dynamic compositions.
- Try panning the camera to follow a moving subject, keeping it sharp while blurring the background.
- Review your images on the camera’s screen and adjust settings as needed.
For more ideas on working with moving lights, you might also enjoy how to shoot moving lights, which covers additional techniques and inspiration.
FAQ
What is the ideal shutter speed for capturing motion blur?
The best shutter speed depends on your subject and the effect you want. For light trails or moving vehicles, try 1–10 seconds. For subtle blur in people or water, 1/4 to 2 seconds often works well. Experiment to find the right balance between sharpness and blur.
Do I need special equipment for this style of photography?
While a tripod is highly recommended to keep your camera steady, you don’t need expensive gear. A camera with manual controls, a tripod, and optionally an ND filter are usually enough. Even some smartphones can be used if they allow manual shutter speed adjustments.
How can I avoid overexposure during long exposures in daylight?
Use a neutral density filter to reduce the amount of light entering the lens. Also, select a small aperture (higher f-number) and keep ISO as low as possible. If your camera has a built-in ND mode, enable it for extra control.
Exploring the world of slow shutter techniques can transform everyday scenes into works of art. With a bit of practice and the right approach, you’ll be able to create images that capture the beauty of motion and light in unique ways.