

How to Layer Photo Wall Art for Stunning Visual Impact
As a professional photographer, the art of displaying your work doesn't just stop at taking stunning photos. It's about how you present them, especially when it comes to decorating spaces with photo wall art. One of the most effective techniques is layering, which can transform a simple wall into a dynamic gallery. In this article, we'll explore how to layer photo wall art effectively to create an engaging and visually appealing space.
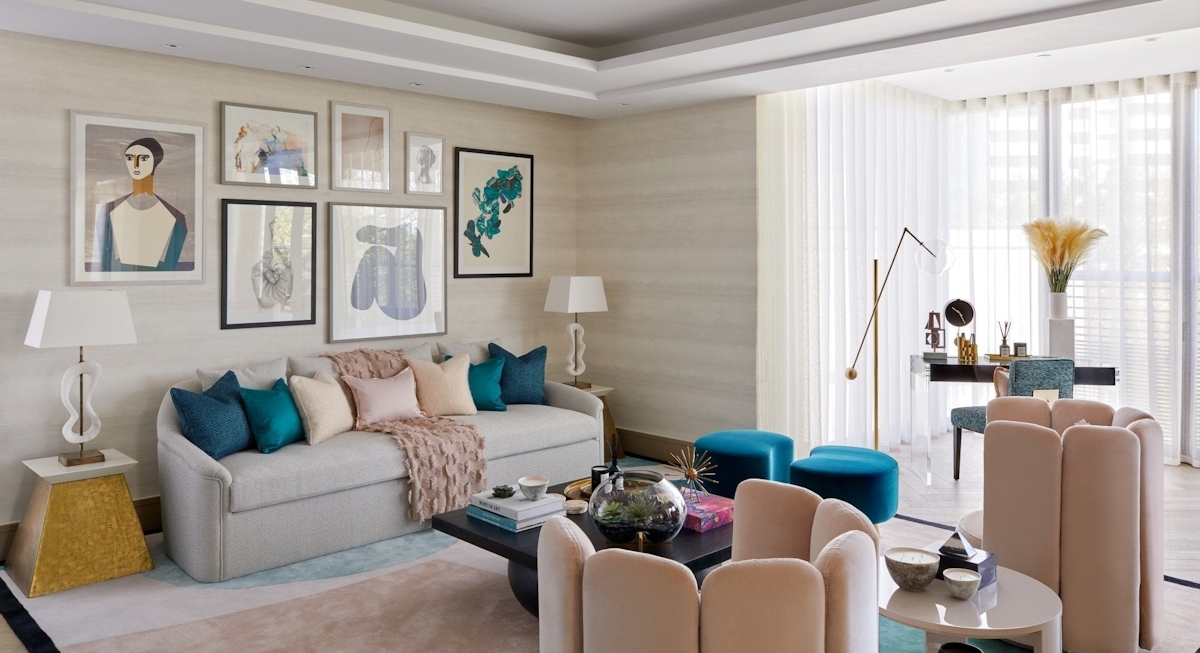
Understanding the Basics of Layering
Layering photo wall art involves arranging your photos and art pieces in a way that adds depth and dimension to the wall. This technique helps in showcasing your artistic vision and enhances the overall aesthetic of the room. For professional photographers, mastering this skill can elevate your work and offer your clients a unique viewing experience.
Choosing the Right Photos
The first step in layering photo wall art is selecting the right photos. Consider using a mix of sizes, styles, and orientations. You might include a blend of portraits, landscapes, and abstract pieces to create a balanced and intriguing display. Ensure that the photos you choose resonate with the space's theme and color scheme.
Plan Your Layout
Before you start hanging your photos, it's crucial to plan the layout. Use paper cut-outs or digital tools to experiment with different arrangements. Keep in mind the visual flow and balance of your composition. This step is essential in achieving a cohesive look that tells a story through your photographs.
For inspiration, you can explore ideas from the photo wall ideas for small spaces to understand how to maximize even limited areas.
Incorporating Different Elements
Layering isn't just about photos. Incorporate other elements like mirrors, artwork, or textured pieces to add variety. This technique can create a dynamic interplay between different elements, heightening the visual interest of the wall.
Playing with Colors and Textures
Colors and textures play a significant role in layering photo wall art. Use frames in different textures or colors to add contrast and depth. You might want to balance bold colors with neutral tones to avoid overpowering the space. Consider ideas from balancing colors in photo wall layouts to perfect your composition.
Lighting Considerations
Lighting can make or break your photo wall art. Ensure that your photos are well-lit but not exposed to direct sunlight, which can cause fading. Use adjustable lighting to highlight specific pieces and create a focal point.
Hanging Techniques
When it comes to hanging your photo wall art, precision is key. Use a level to ensure your frames are straight and evenly spaced. Command strips or picture hangers are excellent for securing your pieces without damaging the wall.
Maintenance Tips
Once your photo wall art is up, maintaining it is crucial to preserve its aesthetics. Dust your frames regularly and check for any signs of wear. This practice ensures that your display remains a stunning focal point in your space.
For more tips on keeping your wall art in top shape, check out these DIY wall art ideas that offer practical advice for long-term care.
Conclusion
Layering photo wall art is an art in itself that requires creativity and planning. By following these steps and embracing your unique style, you can create a photo wall that not only showcases your professional work but also adds a personal touch to any space. Remember, the key to a successful display is harmony and balance.
FAQs
What is the best way to start a photo wall?
Begin by selecting a theme or color palette for your photos. Plan your layout using templates or digital tools to ensure the arrangement complements the space.
How can I incorporate different art styles in my photo wall?
Mix and match frames, textures, and art styles to create contrast and interest. Use a cohesive color scheme to tie different elements together.
What should I avoid when layering photo wall art?
Avoid overcrowding the wall or using frames that clash with the overall theme. Ensure that your photos are the focal point and not overwhelmed by other elements.