

How to Use Photography Lighting Kit for Stunning Results?
Understanding how to use photography lighting kit effectively can elevate your craft, making your photos stand out in an oversaturated market. Lighting can define the ambiance of a shot and control the viewer's attention, making it a crucial aspect of any professional photographer's toolkit. Whether you are in a studio or outdoors, the right lighting setup can turn a mundane photograph into an extraordinary image.
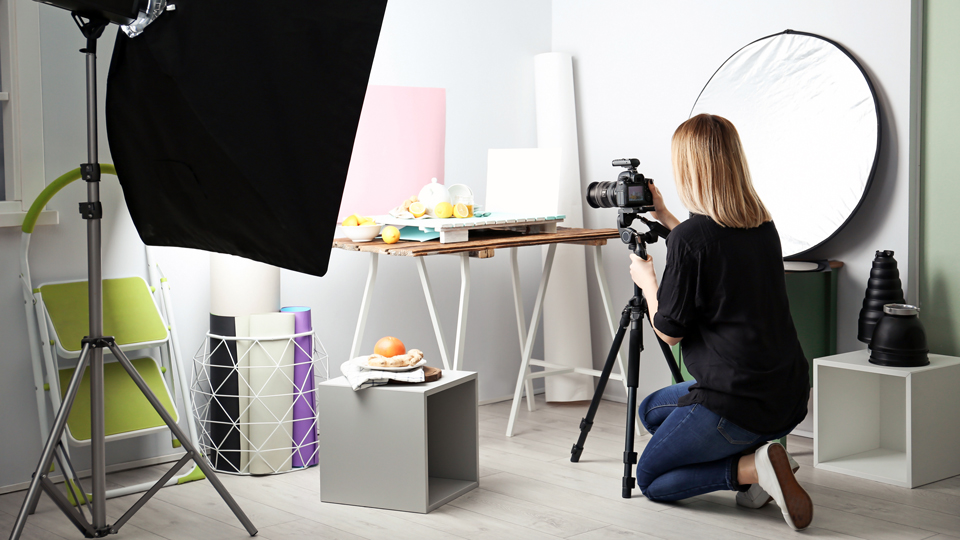
The elements involved in a photography lighting kit are multifaceted, ranging from softboxes to reflectors. If you are a professional photographer, knowing how to manipulate these components to your advantage is essential. This article aims to provide an in-depth guide on effectively using a photography lighting kit, enhancing your skills, and making your work shine.

Understanding the Components of a Photography Lighting Kit
Before diving into how to use photography lighting kit, its crucial to know the components you will be working with in your lighting setup. Typically, a lighting kit includes:
- Softboxes - To diffuse light and reduce harsh shadows.
- Umbrella Lights - Quick setups ideal for portable lighting.
- Strobe Lights - Flash units that produce bright bursts of light.
- Reflectors - To bounce and fill shadows.
- Light Stands - Essential for mounting your lights securely.
Each of these components plays a pivotal role in how you can manipulate light to achieve various textures and tones in your photography.

Setting Up Your Photography Lighting Kit
The next step in how to use photography lighting kit is understanding how to set it up correctly. Follow these steps:
- Choose a Location: Select an area that allows for ample space and flexibility for your lighting arrangement.
- Position Your Main Light: Place the main light source, usually a softbox or a strobe light, at a 45-degree angle from your subject. This position creates depth and dimension.
- Add Fill Light: Use a reflector to fill shadows created by the main light. This balance breaks the harshness seen in some photographs.
- Adjust Background Lighting: If necessary, add a hair light or background light to enhance the subjects outline and separate them from the background.
For more tips on effective lighting techniques, refer to this beginner's guide.
Types of Lighting Techniques in Photography
Understanding the lighting techniques is part of how to use photography lighting kit. Here are some of the most used techniques in the industry:
1. Three-Point Lighting
This classic technique involves using three lights: a key light, fill light, and backlight. This setup creates a well-rounded illumination that minimizes harsh shadows.
2. Rembrandt Lighting
Rembrandt lighting produces a characteristic triangle pattern under one eye of the subject, esteeming a dramatic and artistic perspective.
3. Split Lighting
This lighting setup casts one half of the face in shadow while illuminating the other half. Its excellent for producing a moody atmosphere.
If youre interested in different types of lighting photography, check out this resource on photography lighting types.
Common Mistakes to Avoid When Using Lighting Kits
Many photographers, especially newcomers, make errors that may compromise their lighting quality. Here are a few common pitfalls to avoid:
- Improper light placement: Not angling your light correctly can lead to unwanted shadows.
- Overexposing your shots: Too much light can wash out colors and details.
- Ignoring background lighting: Failing to illuminate the background may result in a flat image.
Preparation can significantly improve your results. For additional photography insights, check out our article on lighting for portraits.
Tips for Achieving Stunning Results with Your Lighting Kit
As a professional photographer, applying these tips can significantly enhance your final images:
- Experiment: Dont shy away from trying different setups to see what works best for you.
- Control Ambient Light: Always be aware of how natural light interacts with your artificial lighting.
- Modify Lights: Use various modifiers like snoots or gels to customize the lighting effect.
Further insight on photo modifications can be found in our guide on uploading pictures.
FAQ Section
1. What is the best lighting for portrait photography?
The best lighting for portraits often combines soft light sources with reflectors. Softboxes or natural light from windows are preferred for a flattering effect.
2. Can I use a photography lighting kit for different types of photography?
Absolutely! A photography lighting kit can be adapted for various kinds of photography, including product, portrait, and even landscape photography depending on how you adjust the lighting elements.
3. How do I choose the right photography lighting kit?
Your choice should depend on your shooting style. Beginners might prefer compact kits, while professionals could opt for more robust setups with multiple light sources.
As an Amazon Associate, I earn from qualifying purchases.