

DIY Photo Wall Art: Transform Your Space with Creativity
As a professional photographer, showcasing your work is just as vital as capturing those moments. Crafting DIY photo wall art allows you to add a personal touch to any environment while highlighting your finest pieces. This guide will walk you through the steps to create impressive photo wall art that is sure to enchant and inspire.
The Artistic Allure of Photo Walls
Photo wall art has surged in popularity, especially among creatives looking to blend artistic elegance into their surroundings. A thoughtfully arranged photo wall acts as a powerful storytelling medium, revealing glimpses into different times, places, and emotions. By carefully curating your photography, you will engage viewers and provoke emotional responses.
Begin by contemplating the narrative you want to convey. Whether it's a visual journey through your career or a collection of iconic shots, maintaining a cohesive theme is essential in unifying your narrative.
Selecting the Perfect Photos
Choosing photos for your wall art goes beyond mere selection; it's about finding images that resonate with your artistic vision. Opt for high-quality photographs that embody your style and skill. Pay attention to the mood, color scheme, and overall composition of each piece.
Consider the size and arrangement of your wall art. Would you prefer a structured grid, or is a more eclectic style appealing to you? Each image should function independently as art while harmonizing with the rest.
Materials and Tools for Your DIY Projects
To create DIY photo wall art, you'll need essential materials and tools. Depending on your preference, frames, canvases, or alternative display methods might be required. For a contemporary vibe, choose metal or acrylic frames, whereas wooden frames add a rustic feel. Canvas prints can provide a gallery-style aesthetic.
Additionally, gather tools like a level, measuring tape, and hanging hardware to ensure accuracy during setup. If a minimalist approach appeals to you, adhesive strips or magnetic frames offer a sleek, damage-free solution.
Arranging Your Photo Wall
The layout of your photo wall plays a significant role in its visual impact. Before you start hanging your photos, its wise to arrange them on the floor or use templates to explore various configurations, allowing for adjustments that can enhance the overall look.
Be mindful of the spacing between images. Consistent spacing fosters harmony, while varied intervals can introduce an element of surprise. Mixing horizontal and vertical orientations creates a dynamic display.
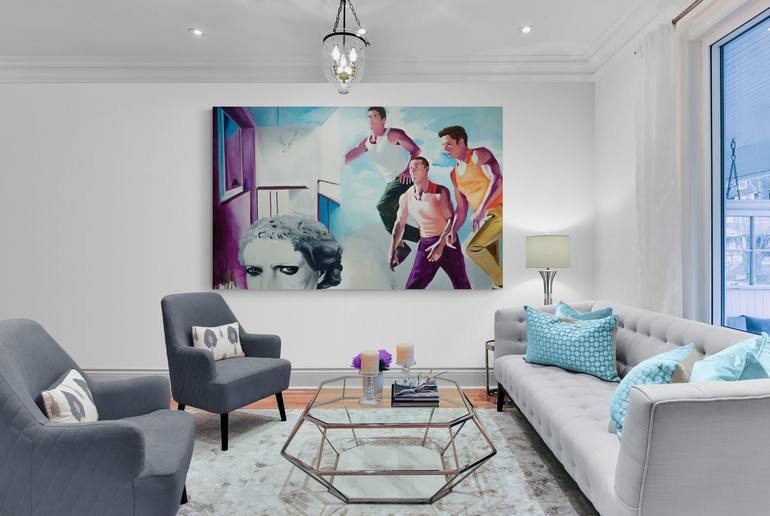
Incorporating Personal Elements
While the photographs are the centerpiece, infusing personal elements can elevate your wall art's effect. Add features like decorative frames, wall decals, or small sculptures for depth and texture, and consider a standout piece, such as a large photograph, to serve as a focal point.
Lighting is crucial in accentuating your photo wall. Implement adjustable lighting to spotlight specific areas, drawing attention to your most captivating images. Proper lighting can dramatically enhance the visual appeal of your display.
Maintaining Your Photo Wall
To keep your DIY photo wall art looking its best over time, regular care is necessary. Dust frames and clean glass surfaces to maintain the freshness of your photos. For canvas prints, gently wipe them with a soft, dry cloth.
Consider the room's environmental factors. Prevent direct sunlight from fading colors and protect the photos from humidity and temperature changes by selecting a stable location.
Inspiring Ideas and Resources
Seek inspiration from galleries and online spaces that display innovative photo wall designs. Websites like Minolta Review and Beats Fit Pro can spark new ideas while offering practical advice. For further reading on the benefits of wall art, explore this informative article on Wall Art Benefits.
Consider participating in workshops or collaborating with fellow photographers to share techniques and insights. Connecting with a community of like-minded creatives can inspire fresh ideas and enhance your DIY initiatives.
Conclusion
Designing DIY photo wall art is a fulfilling project that allows photographers to display their artistry while embellishing personal spaces. With careful selection and arrangement of your photographs, you can create a captivating showcase that resonates with viewers and tells a meaningful story.
Whether you're an experienced artist or delving into new creative paths, the journey of crafting photo wall art invites endless experimentation and innovation. Embrace this chance to rejuvenate your space and let your photography shine in its most impressive form.

FAQ
Q1: How do I select the best photos for my wall art?
A: Choose high-quality images that embody your style, theme, and story. Assess the mood, composition, and color palette of each photograph.
Q2: What tools do I need for creating photo wall art?
A: Essential tools consist of frames, canvas, hanging hardware, a level, and measuring tape. Adhesive strips can offer a discreet look.
Q3: How can I care for my photo wall art?
A: Dust frames and clean surfaces regularly. Avoid direct sunlight and ensure stable environmental conditions to maintain photo quality.