

Light Balance in HDR Photography
Achieving the right light balance in HDR photography is essential for creating images that are both visually striking and true to the scene. High Dynamic Range (HDR) techniques allow photographers to capture a broader range of tones, from deep shadows to bright highlights. However, without careful attention to how light is distributed and blended, HDR images can appear unnatural or lose their intended impact.
This guide explores the principles behind balancing light in HDR, practical tips for both shooting and post-processing, and how to avoid common pitfalls. Whether you’re new to HDR or looking to refine your technique, understanding the nuances of light is key to producing compelling results. For those interested in related topics, our article on understanding bokeh and light offers further insight into how light shapes photographic style.
Understanding Dynamic Range and Its Impact on Exposure
Dynamic range refers to the difference between the darkest and brightest areas in a scene. Cameras have a limited ability to record this range compared to the human eye. HDR photography addresses this by combining multiple exposures, each capturing different parts of the tonal spectrum. The result is a single image that retains detail in both shadows and highlights.
Proper light balance in HDR photography ensures that no part of the image is overly bright or lost in darkness. This balance is achieved by carefully selecting exposure values and blending them in post-processing. It’s important to avoid over-processing, which can lead to halos, unnatural colors, or a cartoonish look.
Essential Shooting Techniques for Balanced HDR Images
Capturing well-balanced HDR photos starts with a thoughtful approach to shooting. Here are some practical tips:
- Use a tripod: Stability is crucial when taking multiple exposures. Even slight movement can make blending difficult.
- Bracket your exposures: Take a series of images at different exposure levels (e.g., -2, 0, +2 EV). This ensures you capture the full tonal range.
- Keep ISO low: High ISO can introduce noise, especially in shadow areas. Use the lowest ISO setting possible for cleaner results.
- Watch for moving elements: Subjects like people, cars, or leaves can cause ghosting when merging exposures. Some HDR software offers de-ghosting features to help address this.
For those interested in capturing movement within HDR scenes, our post on capturing dynamic movement provides additional techniques for managing motion and light together.
Blending Exposures for Natural Light Distribution
Once you’ve captured your bracketed shots, the next step is blending them to achieve a natural look. Most HDR software, such as Adobe Lightroom, Photomatix, or Aurora HDR, offers automated merging tools. However, manual adjustments are often needed to fine-tune the result.
Key considerations for effective light blending include:
- Maintain realistic contrast: Avoid flattening the image by preserving some distinction between highlights and shadows.
- Control saturation: HDR processing can sometimes oversaturate colors. Adjust vibrance and saturation sliders to keep tones believable.
- Use local adjustments: Tools like brushes or gradients allow you to selectively brighten or darken specific areas, helping to guide the viewer’s eye.
Post-Processing Tips for Enhanced Light Balance
Editing is where much of the magic happens in HDR. Here’s how to refine your images for optimal balance:
- Start with global adjustments: Set the overall exposure, contrast, and white balance before moving to local edits.
- Use tone mapping carefully: This process compresses the dynamic range for display. Subtlety is key—overdoing it can make images look artificial.
- Check your histogram: Ensure you’re not clipping highlights or shadows. A well-balanced histogram typically has information across the range without spikes at either end.
- Sharpen and reduce noise: HDR can accentuate both detail and noise. Apply sharpening selectively and use noise reduction tools as needed.
For scenes with moving subjects, consider techniques discussed in our article on lighting for moving subjects to maintain clarity and balance.
Common Challenges and How to Overcome Them
Even experienced photographers encounter issues when balancing light in HDR. Here are some frequent challenges and solutions:
- Halos around edges: These appear when there’s too much contrast between exposures. Reduce the strength of HDR effects or use masking to blend transitions smoothly.
- Flat or muddy images: Over-blending can remove natural contrast. Reintroduce depth with local contrast adjustments or dodge and burn techniques.
- Unrealistic colors: If colors look off, revisit your white balance and saturation settings. Sometimes, blending in a single exposure for certain areas can restore realism.
- Ghosting from movement: Use de-ghosting tools or manually blend exposures to eliminate double images caused by moving objects.
Creative Applications and Advanced Techniques
Once you’re comfortable with the basics, you can experiment with more advanced approaches to light management in HDR:
- Selective HDR: Apply HDR blending only to parts of the image that need it, such as the sky or foreground, while keeping other areas natural.
- Blending with masks: Use layer masks in Photoshop or similar software to manually control which exposures affect specific regions.
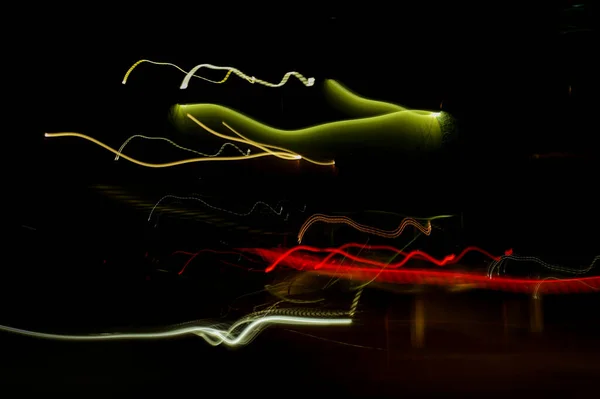
- Combining HDR with other effects: Techniques like experimenting with shutter drag can add motion blur or creative lighting effects to your HDR compositions.
For a deeper dive into how light interacts with your subject, consider reading this comprehensive guide to understanding light from Learning with Experts.
Frequently Asked Questions
What is the ideal number of exposures for HDR photography?
Most HDR images are created from three to five exposures, covering a range from underexposed to overexposed. The exact number depends on the scene’s contrast and your camera’s dynamic range. More exposures can provide smoother transitions but require more careful blending.
How do I avoid unnatural results in HDR images?
To keep your HDR photos looking realistic, use subtle tone mapping and avoid pushing contrast or saturation too far. Pay attention to local adjustments and always compare your final image to the original scene for reference.
Can I create HDR images from a single RAW file?
Yes, it’s possible to simulate HDR by processing a single RAW file at different exposures and merging them. However, this approach has limitations, as it relies on the dynamic range captured in one shot. Bracketing multiple exposures generally yields better results.
Conclusion
Mastering light balance in HDR photography takes practice, patience, and a solid understanding of both technical and artistic principles. By focusing on careful exposure, thoughtful blending, and subtle post-processing, you can create images that capture the full beauty of a scene without sacrificing realism. Explore related topics like how to shoot motion portraits to further expand your creative toolkit and refine your photographic style.